
Everything You Need to Know About Selling Your Child’s Clothes at Børneloppen
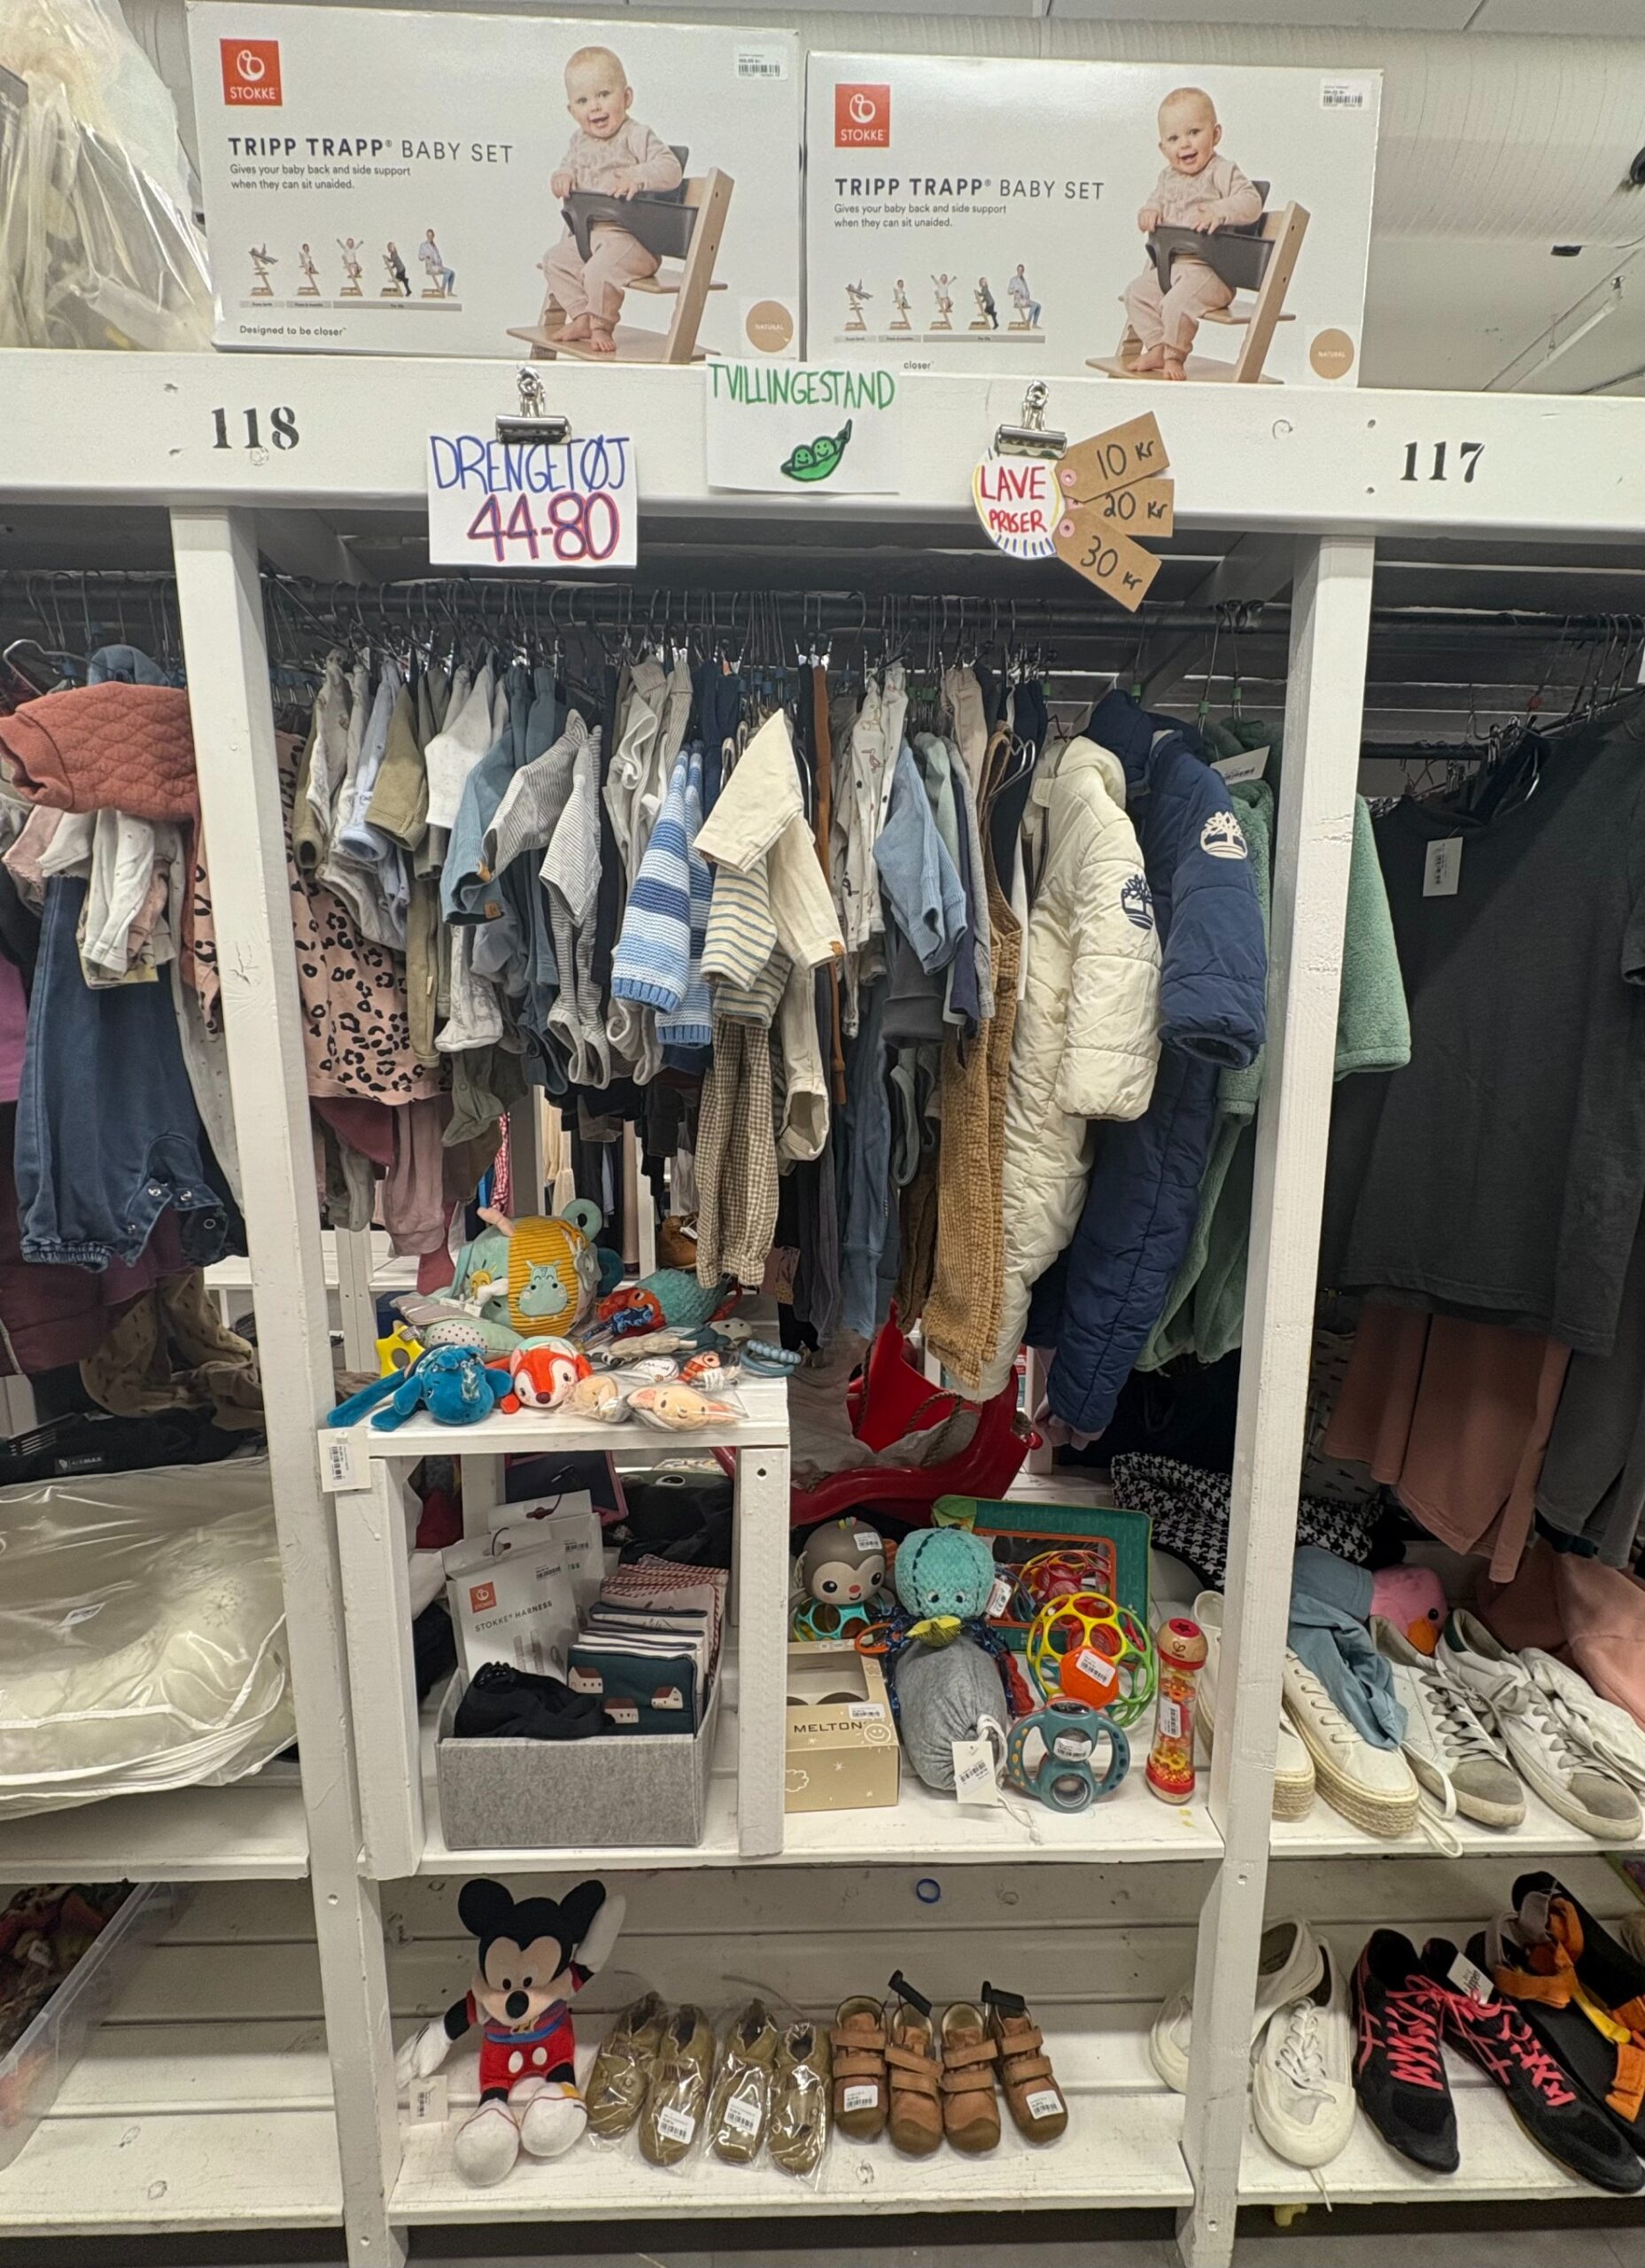
Last fall, I ran a stand at Børneloppen Vanløse for two weeks, and I wanted to share my experience — both to reflect for myself and to help anyone else considering doing the same. Overall, it was a positive and surprisingly profitable experience, but there are definitely a few things I would do differently next time.
What I Sold and How Much I Made
My stand featured baby and toddler clothes from premature sizes through size 80, along with accessories like shoes and hats, plus outerwear and flyverdragter from the first year.
- 🧺 Items sold: 145
- 💰 Profit: approx. 3,500 kr (after subtracting the stand fee of 420 kr and about 100 kr in printing and cleanup costs)
- 📦 Items unsold: around 90
Based on what I had read online, I was hoping to make around 2,000 kr in profit, so I was thrilled to end up at 3,500 kr. A big factor was that I had around 10 higher-value items priced at 100 kr+ that sold quickly. Toward the end of the period, most sales were in the 10–20 kr range per item.
My “brand” clothing (Name It, Lil Atelier, Wheat, Joha) sold much better than more generic or budget brands like H&M, many of which I had originally purchased secondhand at Børneloppen for 10–20 kr per piece.
How Much Can You Expect to Make?
This seems to vary a lot. I’ve seen people report earnings from 4,000 kr in one week to 4,000 kr in a month, before costs. I also read about profits in the 2,000–3,000 kr range for stands of varying durations.
In my experience, I’d say it’s realistic to aim for 2,000–2,500 kr profit and be pleasantly surprised if you make more. Your results will depend on the quality and pricing of your items, the season, and your stand’s location.
How Long Should You Rent a Stand?
For me, two weeks was a good length. I sold most of my valuable items in that time, even though I still had plenty left over. My main goals were to 1) recoup some of what I’d spent on kids’ items, and 2) clear space at home — so I was happy to donate or give away what didn’t sell.
For leftover higher-value pieces (like a Wheat flyverdragt), I plan to list them on Reshopper, where I’ll probably make the same or more than if I’d sold them during the stand period.
What Worked Well
- Using theme areas: I placed premature clothes on the premature rack, flyverdragter on the outerwear stand, Name It sets on the rotating Name It stand, wool items on the wool stand, and maternity clothes in that section. This helped visibility and cleared space at my stand.
- Discount strategy: I only applied a 25% discount in the final days, which didn’t seem to boost sales — if anything, sales slowed. Personally, I’d rather give unsold items away than sell for a few kroner.
- Aesthetic presentation: A tidy, easy-to-browse stand attracts buyers. I avoided adding a double hanger rod so shelf items were more visible — this worked well for the sizes and types of clothes I sold.
What I Would Do Differently Next Time
📍 Choose a Prime Stand Location
When booking a stand, you can hover over each space on the website to see its popularity. My stand was near the back but still performed well, though I’ve heard that stands at the front often sell more.
🧹 Plan for Time (or Outsource)
I wasn’t working during this period, so I could visit often to restock and tidy. If I were working, I would:
- Fill the stand fully (around 150 items) from the start
- Hang only more expensive items and use baskets for cheaper ones
- Pay for daily cleaning (100 kr/week)
- Restock once a week rather than every few days
🏷 Streamline Price Tagging
Price tagging takes time. Next time, I’d:
- Print all labels a few days before the stand starts (it costs 10 kr each time you print)
- Rent a tagging gun and do it all at home
- Tag about 100 items, per week of stand rental, in advance
💸 Refine Pricing
Some items sold almost instantly, which makes me think I underpriced them. A good strategy might be to start higher and adjust as needed. For example, I sold two pairs of Bisgaard rain boots — the first for 50 kr (sold in a day), the second for 70 kr (also sold in a day). I probably could have priced both above 70 kr.
🪧 Better Signage
I had signs, but I noticed some great ideas at other stands. Clear signs indicating sizes and themes help people navigate. Use the colored beads on your hangers, but don’t skip a sign.
Amager vs. Vanløse Børneloppen
A new Børneloppen opened on Amager, and it seems just as popular as Vanløse. It’s smaller, which could mean less foot traffic but also better visibility for your stand. When I visited in mid-September, it was busy, but I didn’t find much to buy. In Vanløse, I almost always find something interesting.
If both are options, I’d pick based on which has better stand availability and is closer.
Best Time to Start Your Stand
Starting on a weekday is ideal, in my opinion. You set up between 17:00–19:00 on weekdays, and you lose less selling time at the end compared to a weekend start.
Most of my sales happened:
- Weekdays: 11:00–15:00
- Weekends: 13:00–17:00
Because my stand ended on a weekend, I lost that peak afternoon period on the last day.
Final Thoughts
Running a stand at Børneloppen was absolutely worth it for me — both financially and for the decluttering. With a bit of planning, strategic pricing, and smart use of theme areas, it’s possible to make a decent profit while passing on clothes to new families.
Next time, I’ll tweak a few things, but I’ll definitely consider doing it again!